Sidor

Visar inlägg med etikett tutorial. Visa alla inlägg

lördag 23 januari 2016

Lots of nail tips in this post!!

It has become a weekly routine to change nailvarnish. Sundays or saturdays are the days for this activity. You know already that I sit a lot, studying or working by the computor and thats a time I can combine with nail painting.

One design I've always wanted to achieve is the triangled "half moon". I tried with scotch tape, sticky notes etc. You can see my sticky note result at my pointing finger, really bad.
Then Johan came up with the brilliant idea that I should try his electrical tape because its very flexible. It worked great! Another tip is to cut the tape in a small triangle and not a square, that makes it even more flexible, but smaller piece to handle. My ring and pinkie finger nails are masked with the last tape.
I might have written this before but I would like to add some tips to my:
How to grow long nails
List
  • File your nails in a pointy shape. Specially if your nails tends to brake from the sides.
  • I know eat sleep and live well have influence on how your nails will look and you already know that.
  • I have noticed that my nails are breaking easier and are weaker, like my hair, as I become older and coming closer to the menopause (not there yet). So stay young noting the line above.
  • Use a nail polish remover that doesn't weaken your nails. I tried one acetone free that actually dilluted the plastic of my keyboard, it contained propylene carbonate. I use one now that contains ethyl acetate and it works fine.
  • After the polish remover, wash your hands and moisturize and re-grease them with a oil rich hand cream.
  • Use a protecting base coat, like the one in the photo below. Two layers.
  • Do your nail art and let the varnish dry completely befor another layer is applied.
  • Finish with a hard top coat that protects your design.
  • Don't hurry. I did and broke several nails while digging in my handbag for keys.


tisdag 5 januari 2016

Nail art

I read a lot of books and work in front of the computor, that can become very boring, so in an attempt to cope with sitting still; I paint my nails. You know, nail varnish needs time to dry, right?
Inspired by Cutenails tutorials I tried nailart myself, an easy one. Well not very easy, my hands are a bit shaky and I will not show you the other hand that I painted with my right hand (I'm lefthanded)
I used a golden varnish as a base and black and ocra acrylic paint to make swirls and dots. The tools comes froma nail art box I bought at the local supermarket, nothing fancy. I used a dotting tool and a fine brush. 
Heres a video of some inspiration. This video is quite old but it's a good starter and she has developed her style tremendously since then.
Like this one

Time for digging down in my books again, while the varnish is drying.


lördag 19 september 2015

DIY Nailpolish shelf

I'm so sorry for not keeping up reading your blogs. I really don't have the time. I thought this semester would be easier but apart from the teaching schedule I have a large bunch of students to help them to fix old failed examinas. Plus no time for studying myself, bohoo!
A while ago, I got this great idea. I was tired of digging for the right colour in the basket where I store my nailpolishes . I thought of looking for a spice shelf but something made of acrylic would be more practical. It's easier to see the package and the colour with a transparent material, right? 
My idea took shape after som measuring and scetching. And it is easier than I thought, so I must share it with you :-)
First of all you need acrylic plastic. Check the size your supplier sells and calculate how much you need. I hung my shelves on the inside of the bathroom cupboard and the sheets with the size below were perfect. On both sides there is a plastic shield that you should leave until it's time to heat the plastic
The shelv is basically a rectangular piece that is bent two times to form the shelf. First I take a fine toothed saw (for sawing steel tubes etc) and cut of 10mm on the lenght side. This part will be sides of the shelves.
On the side that will be the upper part of the shelf, two holes for hanging is drilled. I recommend you to buy screws in the right dimension before you drill a hole.
Now is the time to remove the shielding plastic. Take a sharp needle or something and a ruler. Measure out were the bends should be placed and carve a line with the help by the ruler and needle. Use a heating gun to warm the plastic on both sides. Remember, this will need time, patience and control. If you heat the plastic to much the plastic will bubble before you even notice. Too little and the plastic will never bend. 
Note that your surface should be CLEAN. I got some spots on the acrylic while working on this bench. Anyway the steel lined work bench were perfect for this job. With some help of a scrapped steel plate I bent the front of the becoming shelf. Don't take short cuts on this, the bend must be 90 degrees.
Heat again on both sides of the plastic and bend again. 

This is how the finished shelf looks like in a closeup. A piece of acrylic is glued with super glue on the sides. The nail polish bottles slip very easy.

Shelves are ready to be filled. Well I filled them and there were half of the nailpolishes left. So I have to make some more of these. One cannot have too many nailpolishes.

A shitty summer turned to a nice autumn. No frost yet and some weird delays in natures circle like, flying ants 22 of august instead of the 8th like they always do. I'm convinced it's the pollution.


 I finally got some black hollycocks in bloom. They have a different shade depending on the light, its very nice. I got a row of large sunflowers filled with seeds. The bumblebees likes to rest in them. Some of them get slower and slower until they die hanging on the flower. Anyway the seeds will become healthy sprouts for the winter.

torsdag 26 mars 2015

Tutorial: Make your own candles and a Giveaway

For you dear readers who has kept on reading my blog inspite of boring and delayed posts I will have a giveaway this post, to thank you all. 
First I would like to share a tutorial with you of how to make candles. 
I guess that you have already noticed that I'm interested in non-polluting issues? I don't like to waste things that can be reused at least once before throwing away  leaving it in the recycling bin.

Make your own block candles. 
What you need:
cotton yarn (for chrocheting, any colour will do)
empty beer cans or pringle tubes etc
adhesive putty
a stick, twig, pen (of that sort)
rests of candles, parraffine or stearine
a saucepan and an empty can
(one of my burning beer can candles)

The yarn is for the wick. You can choose to twine it double or you can braid it. I chosed to braid it this time because the double twined is a bit too thin (dependes on the thickness of the yarn of course). It takes time but it's worth a little patience. You can also buy premade candlewick but then you pay for something you propably already have. 

Pinch a hole in the center of the bottom of the beer can and tuck the wick through the hole, maybe you need to use a chrocheting hook to pull the wick through (I did). Tie a knot at the bottom and secure the hole and knot with lots of putty. 

Hold the wick straight and pull a stick through the braid or tie the braid around it. You need to keep the wick in the centre.

Melt your remnants from old candles but remove the coaled wick first. For a beer candle you need approx. 400 g of material. Heat water in the saucepan on the stove and put a can with stearine in the water to melt.
When everything is melted pour it in your mold (beer can) but leave a little.
As you can see on the photo above, I have used socks to isolate the can. This was an useless experiment. I wanted to prevent pipe forming during cooling but it didn't work.
After a couple of hours, a pipe is forming in the middle. It is neccessary to melt more stearine and to fill it up. If you don't, the wick won't longer be centered and instead, you have a hole in the middle. 
It's important that you work on a sturdy surface like a kitchen bench the putty can leak hot stearine.

Leave the candle to cool over night and peel off the can. Don't throw aluminum in your ordinary waste bin. Metal and especially aluminum is very energy saving to recycle. 
This is how one of my candles turned out (below). It is made of remnants from halloween candles.
Next tutorial is a glass jar candle and also the one I will share to one of my readers...
Use an old holder from a tea candle and press the hole open with a metal pin (or something). Pull the wick through and press the hole tight again with a plier. Glue the holder to the center of the bottom of a glass jar with hot glue.

 Here's another tip I can give you: old tea light holders are made in aluminum but the wick holder is made of steel. If you put those in the recycling bin you need to separate the wick holder from the aluminum, otherwise the aluminum will follow the steel holder with the magnetic separator and end up as fumes in the air (not very good, right ?). 

Ok, well. Center the wick in the same fashion as the beer candle and do the same procedure. 

If you have some oilscents you like, you can add a few drops to the molten stearine before pouring it in you mold. 
The giveaway
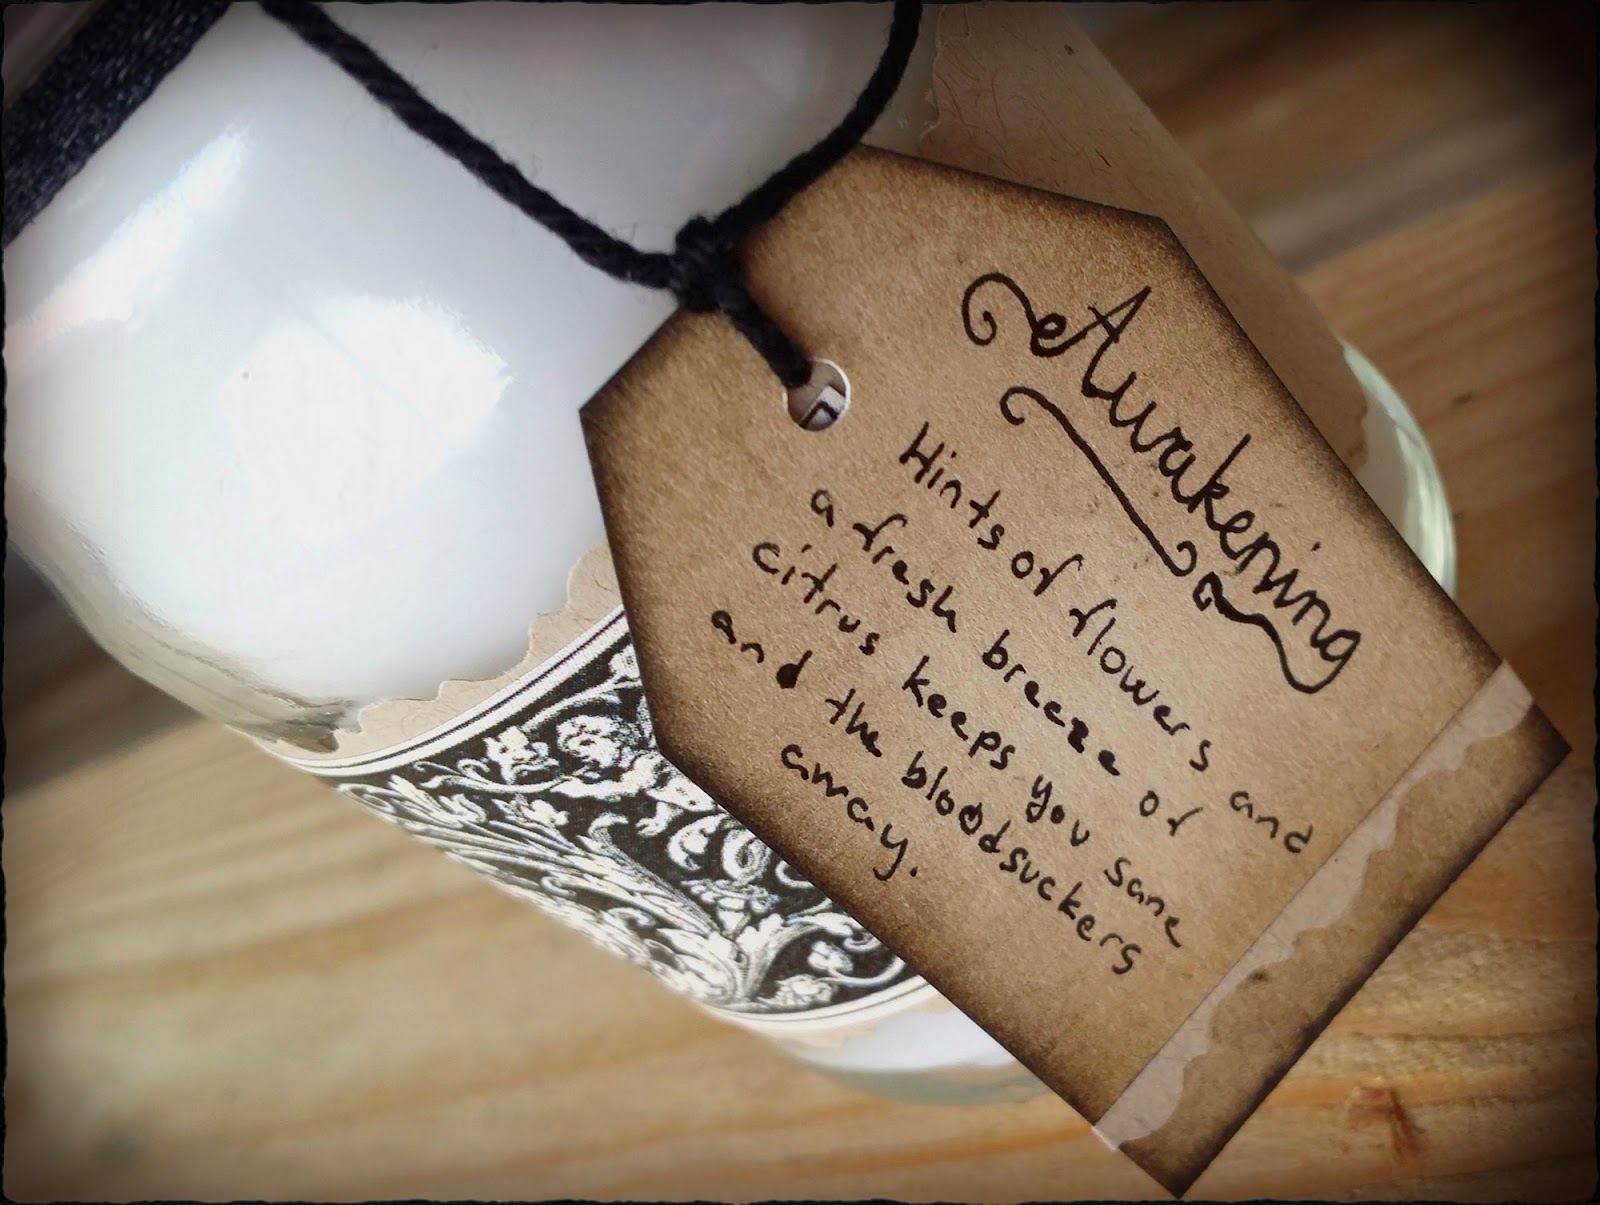
Voilá. Here it is my own recycled jar candle, offered for you as a give away. I embellished the jar with some prints and scraps. 
The oil scent is all natural oils, citrus and ylang-ylang for example.
To join the giveaway you only have to leave a comment and tell me that your'e in. Leave your e-mail adress or tell me how to contact you in other ways.
Take care precious ones!!

The giveaway will be open 2,5 weeks from now, and it is worldwide of course :-)


onsdag 13 augusti 2014

It's the little things

...that makes you happy...
Back at work for a short week because we will go to the local festival; Sabaton open air. The band list this year isn’t very good, too tacky power metal or death metal is not my cup of tea, but there is a few that I really want to see like Revamp, Sabaton and Amorphis.
It was a slow start at work and I don’t feel useful or important, so I’m happy to have a meaningful spare time.

I’ve been busy making wool dreads from wool received from a friend a few years ago. The wool is carefully washed in cold water, then dried. The wool isn’t combed this time and it works fine just by pulling the lumps apart, by that you get rid of the rest bits of grass and sand.

Arrange the wool in a thin row in the length you want the dread to be and spray with a mix of water and soap. Squeeze the wool together a bit before you roll it between your palms quite hard, add more wool to the thin parts or to the thickness that you want the dread to have.
Hang or put them aside. I usually can’t make more than three until the skin on my palms is too soft and slippery. When I have the amount of dreads needed I put on my rubber gloves and continue to felt(not necessary to roll at this step) and last wash them.
I dye the dreads with the cheapest hair dye I can find. If I have time to braid them in I will use them this weekend. Don't be afraid, it's not a tarantula spider, it's the dreads trying to crawl towards my hair...
The garden and the nature is very generous. I love this time when we can base our food on free vegetables and berries. All it costs is a little labor.

This soup throws me back to my childhood and my grandparents garden. Every year they made this soup. It’s called Ängamat, meadow meal (kind of translated).
The ingredients comes from the garden. Carrots, parsnip (instead of cauliflower that I don’t have) a few farmer beans, peas. What’s missing on this photo is parsley and a fresh onion. The stock is first made of vegetable stock and milk with a little flour as thicker. Cook the vegetables in the stock, don’t pour them all at once, carrots and parsnips first… When the vegetables are soft, whisk an egg yolk with a little cream and add along with chopped parsley and serve. Of course season with salt and pepper to your taste.
I have three promising head sized pumpkin growing. Miss Misantropia was so kind to send me some seeds of her. I guess that the dark green ones will be orange and the yellow will become beige or white when it’s time for harvest.


söndag 30 mars 2014

My trick for long nails and a nail polish review

After many years of rectangular nails, I filed them pointy and discovered that I could grow them longer. They are so long now that there is a problem typing this down. The problem with the rectangular nails was that they got a notch in the outer corner and then broke. Sometimes they broke under the nail line and that was painful. By filing the weak part down and making them pointy, the nail got stronger.
The tube I'm holding in the photo above is a product we are making at the factory were I work. It's a baby bum salve containing vaseline (usually avoid that), peanut oil, citrus oil, and zink oxide. I discovered that this salve is making the nails very strong, hard but still a bit flexible. You can try any fat cream or salve if you can't find this one.

I can only paint my nails in the weekends, because of hygiene instructions at work. But to get a polish that lasts longer than a weekend you can follow a few simple steps. 
Always start with a protecting basecoat. Glitter nail polish directly on to your nails aren't very good.
Then nailpolish in the amount you need.

This polish came with my monthly Glossybox. The brand is Models Own and sells many different colours. This one wasn't anything I would recommend though the quality of the polish itself is good. Those aluminium foil looking chips were few and had to be fished after in the bottle. To get a decent spread of flakes, I had to paint the nails 3 times. This polish can maybe be used over a warm toned nailpolish for funky effects.
Another item that came in the Glossybox was a sample and a deo spray of a new perfume line. Panos Emporio is a Swedish swimsuit designer that tries a new concept with perfumes. The sample (forgot the name) was a light perfume nothing extraordinary. But the Goldflower deo spray was a nice surprise. It's a powerful vanilla, orange, heavy flowery fragrance. As a typical Swede I'm usually not fond of the heavier perfumes, but this was really nice. Johan loved it as well, so I will definitely buy the eau de toilette. 

I think the Glossybox is a great way to try new beauty stuff that one never would try. 
During saturdays Earth hour we shared a bottle of Prosecco, an extra dry sparkling Italian wine. It tasted nice, dry but although nice. What we were celebrating? Our 5 year anniversary, my math exam and a few more private things :)
 I think Earth hour can be a good event for those who need to be enlightened (yeah funny) by how we influence our environment. All these latest abnormal weather fenomena is actually caused by us humans. The best you can do is to try to lower you electrical consumption and try avoid taking the car. 

onsdag 6 februari 2013

How to grow long and healthy hair


I have tried to grow my hair as long as possible. I started 3 years ago with the normal long hair, down to the shoulder blades. It's reaching to my waist now. I'll try to see how long it can grow. I'm sure you younger readers have a more fast growing hair than mine so you won't have to wait that long time for it to grow. During this time I have come to some conclusions I will share with you.
 1. Don’t cut it! Yes you heard it right. There is a big myth circling around that you have to go to the hairdresser every sixth week to cut of the frayed ends to get a long and healthy hair. Every time I go to a hairdresser and beg them to cut off as little as possible they cut of at least 1½ inch of it (if you are lucky and they are listening to you), that is 4 months of growing hair. Growing long hair takes time. I read a post at a hairdresser’s site that she told her customers that a split straw can’t grow any longer. She is right in one point, it can split further up if it’s not cut off but the growth is not in the end, we know that by now, don’t we? I don't want the hairdresser to loose their jobs this tip is only for those who want their hair to grow.
 2.So how do you do when you have frayed ends? Well you cut the straws with frayed ends not the other. A perfect thing to do when you sit in your sofa watching a boring movie or are bored in any other way. Take a strand of your hair and look at it closely. Frayed ends tend to curl in the end and peak out. Cut just under the frayed end. 
If you bend the hair over your finger you see the shorter straws cut of the ones with split ends.

Your hair can look horrible if you just have  a tenth of frayed ends in your hair , but if you cut off the frayed ends you get a little thinner hair but not shorter. If it looks too thin then cut off the length AFTER you have cut the frayed ends. In that way you’ll probably cut less than you should have otherwise.
 A picture of one of my straws with a split 60mm from the end, not all looked bad like this.
3. Instead of putting money on visits to the hairdresser, buy good products for your hair. Or follow the No Poo movement (haven't come so far yet). 
4. Don’t spray and tease it. For a lift, use dusting powder instead. Dust and rub and there you get the volume needed, simple as that.
This is what I use to get a little volume in my hair. A tiny dust over you hair makes wonder, just rub a little and the hair lifts. It wont get greasy but a little difficult to comb. 
Well I use hairspray but not every day.

 5. Comb your hair carefully. Throw the hairbrush away. If you have tangled hair, use a baby hairbrush and your fingers to ease it out. My son tends to get dreads in his hair while sleeping; the baby hairbrush is the only working tool and my fingers to detangle his hair. Don’t ever pull the comb/brush violently to detangle! Prefer natural material in combs and brushes. Don’t comb or brush wet hair. And keep your tools clean for god sake. There is nothing more disgusting than a brush filled with old hair, dust and remnants of products; it’s literally a bacterial bomb.
6. Avoid stress as long as you can. Learn to say NO to things you can’t join fully. I started to loose lots of hair, even got bald spots because of stress. That is one of the reasons I shaved half my head. Take care of yourself, stay happy. Things/people you can’t change, accept them and avoid them. It is more important than you could guess.
 7. Eat healthy (B and E vitamins)and do your regular exercise. If you lacking nutrients, it's easier to get sick and a high fever can also cause a hair loss. 
8. Avoid washing your hair too often. Use conditioner or oil treatments. I saw a very good tip. Rub in coconut oils in your hair tips in the evening before bedtime, that's better than any other leave in treatment.
 9. Never use elastics with metal connections on or hairclips of metal.
 10. Braid your long hair for the night or put it up in a sock bun. Here's an excellent tutorial. If you lie on your hair you wear it out. 
This is how my bun looks after a good nights sleep and only one hairpin used.
The sock bun gives you lovely Hollywood curls without uncomfortable rolls or heat.
Ha ha, please excuse my tired and unmaked face, it's the curls that are important here. I just rolled the sock out of my hair and pulled my fingers through it, if you roll with a little moist hair the curls will stay bouncy the whole day.

Tired saturday morning right after a quiet breakfast,  yaawn. The other side of the head is shaved. 
11.  Instead of dreads you can buy or make loose dreads to braid in your hair.
I made these of sheep wool, very easy to do and dyed with hair dye. Look more real than syntetic ones. Sigh, I need to make more of these (and more time to do them).
Extra tip: If you have used these for a couple of days the hair can be a mess to sort out. Here comes the little baby brush at help :)

You have probably heard most of them, but I hope I can be a little helpful though. There are lots of more tips to take care of your hair but those are so common that everyone already know them...not rubbing towels, combing wet hair, blow dryers etc etc....

Right now I'm very on and off if I should grow out my side shave or not. I'm not sure I will have the lenght back at that side anymore. It was like it couldn't grow longer than an inch and it was just soft and thin, that spot growed bigger and bigger and every hairwash there was a small wig in the drain. That mass amount of hairloss has stopped thank god and my nails doesn't flake anymore so I think I'm healthier than a few months ago. :)

Please send me a comment if you have any other tips to share for me and other readers!